


Next Day Delivery Available


How to Replace a Washing Machine Door Seal - Hotpoint

Last Updated :
14 Oct 2024
Make and Model of Washing Machine Used in This Video
Hotpoint NSWM743UWUK (769991581901)
Hotpoint NSWM743UWUK (869991581900)
Hotpoint NSWM743UWUKN (769991637831)
Part Used in This Video
Hotpoint Washing Machine Door Seal
1. Tools needed
All you’ll need is some washing up liquid, a Phillips screwdriver and a small flathead screwdriver.

If you notice that your washing machine is leaking water, or if you see mould or mildew buildup around the door, it might be time to replace the door seal.
Before carrying out any work, turn off and eliminate all power to your washing machine.

2. Remove lid, clamping rings and old seal
At the rear, remove the two screws on either side of the machine. Then, remove the lid.

Remove front clamping ring
Locate the spring of the front clamping ring. Once found, use your flathead screwdriver to lift it away and remove from the washing machine.

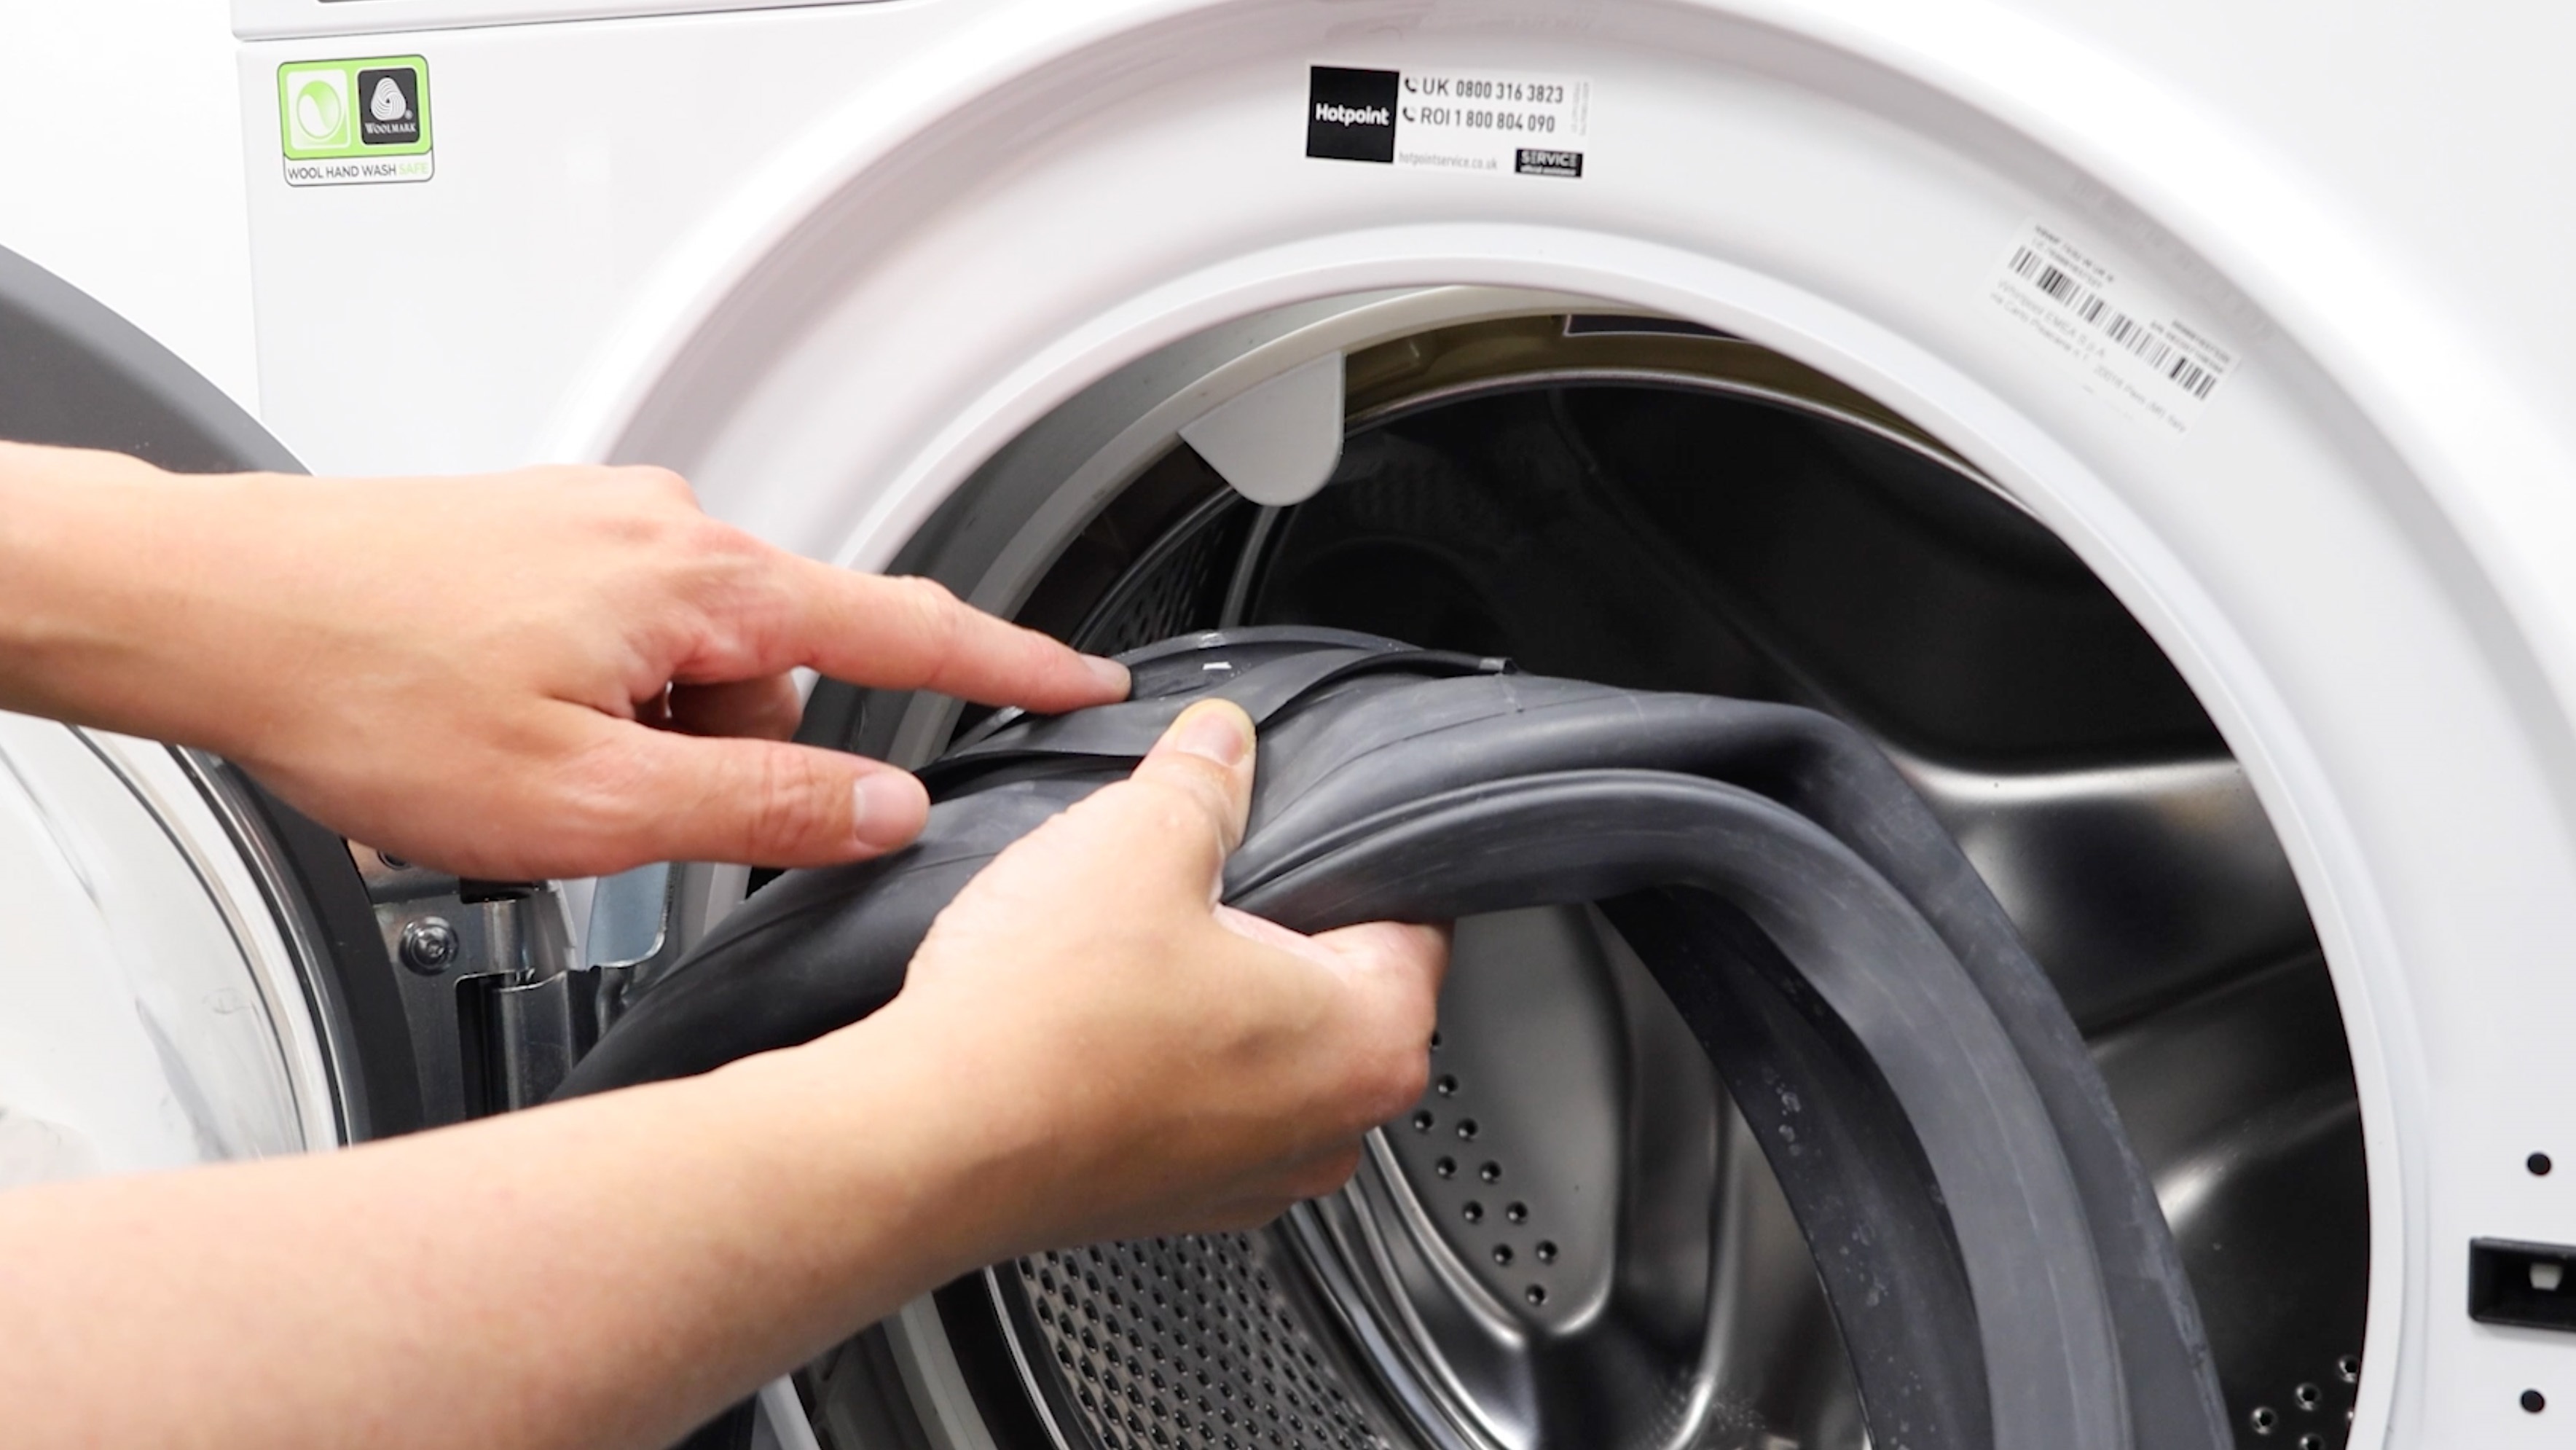
Remove old seal and rear clamping ring
With the front clamping ring removed, remove the old door seal from the washing machine drum by gently pulling it down from the inside and peeling it away from the drum as shown. The rear clamping ring will also pull away.

3. Attach new door seal
Before you fit your new seal, use this as a chance to give anything on your washing machine a good clean. Then, lubricate the seal with the washing liquid to help with the installation process.

Attach seal to drum
The tab from the drum on the inside of your washing machine slides into the hole on your door seal.x
Then, push the seal from the inside around the washing machine so it sits on the washing machine drum as shown. Make sure it’s fitted correctly the whole way around.

Re-attach rear clamping ring
Now fit the new clamping ring. It should be easier to attach the clamping ring as shown, so the spring of the band can be pulled and accessed from the top of the washing machine at the one or two o'clock position when looking at the front of the machine.

Make sure it’s correctly attached to the left side as shown and then start to feed it round to the spring side at the one or two o'clock position.

Take your time as the spring will be tight to get on. If any part isn’t sitting correctly, like at the bottom shown here, gently push it in and into position.

Attach front of seal to machine
To attach the seal to the front, the gap in the seal attaches to the washing machine lip, as shown. If needed, use some more washing-up liquid.

Re-attach front clamping ring
Now re-attach the door seal front clamping ring by inserting it into the door seal.

Feed the front clamping ring all the way around the new door seal so the spring is then tucked under the seal.

Re-attach washing machine lid
Place the lid on and re-screw the two screws back in place.

And then that’s it, your new washing machine door seal is all set to go!
Bosch Washing Machine E18 and F18 Error Code
 Lee Gilbert
  19th Sep 2024 at 11:16
 0 Comments
Bosch Washing Machine E18 and F18 Error Code
The E18 and F18 Bosch washing machine fault code relates to the water flow in to and out of the washing machine.
The most likely causes of the E... Read More
Most Popular Washing Machine Brand In UK
Lee Gilbert 19th Sep 2024 at 10:26
0 Comments
In this article we will cover:
What are the most used washing machine brands in the UK.
Why do manufacturers produce multiple brands of washing machine.
Which manufacturers own which... Read More
About Washing Machine Carbon Brushes & How To Fit
Lee Gilbert 30th Aug 2024 at 13:23
0 Comments
Washing Machine Carbon Brushes - Advice & Fitting Video
This article will explain everything you need to know about washing machine carbon brushes, including a video showing you how to fit t... Read More
How to replace the belt on a Hotpoint washing machine
Lee Gilbert 30th Aug 2024 at 13:12
0 Comments
This is a guide on how to replace the drum belt on this hotpoint washer dryer. Please note that the process is similar no matter what make or model of washing machine you own.
Step 1 ... Read More
How To Replace The Belt On A Bosch Washing Machine
Lee Gilbert 30th Aug 2024 at 12:59
0 Comments
This is a step by step guide on how to replace the belt on your Bosch washing machine. This guide will be useful for all makes and models as the process is very similar on all washing machines.... Read More
